PLAN: "Shoe net"

Disclaimer

Tools may be dangerous and may cause severe injuries! If you operate tools, make sure that you are allowed and able to safely do so. Please read the entire present document before you start following the instructions. Attention Invention is not liable for physical or economic damages eventuating when rebuilding the items specified therein.

In case you rebuild this invention for private usage, at least in Germany you cannot infringe any third parties’ patent rights! However, if you consider selling or using embodiments of this invention for commercial application please make sure not to infringe any third parties’ protective right. Please, ask your patent attorney if you have questions in this regard!

TOOLS

  • Level
  • Folding rule
  • Pen
  • Drill
  • Screwdriver

PARTS

  • Net
  • Screw Hooks

Let’s get started!

First of all, find a place to mount the mesh. An ideal place is an unused door frame or some other wall recess. 

Make sure that the net can be mounted with a clearance of at least 12 to 15 centimeters (5 to 6 inches) to the rear wall. Otherwise, the high heels will touch the wall when the net is swinging or the form fit between the heel and the mesh might even be lost.

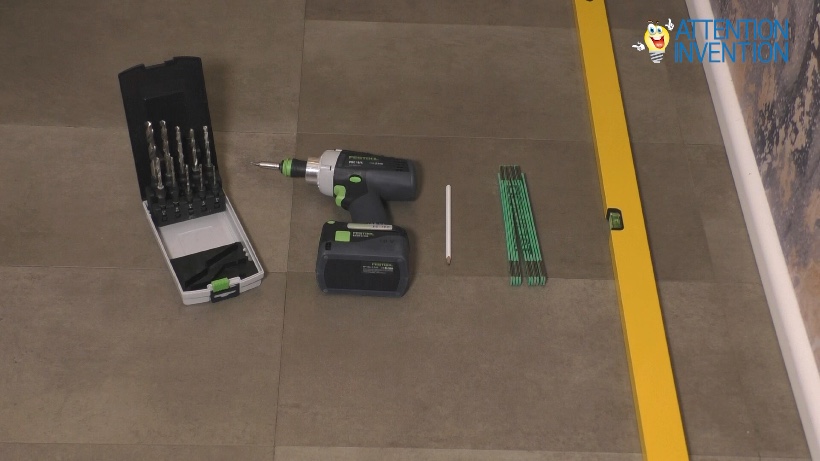
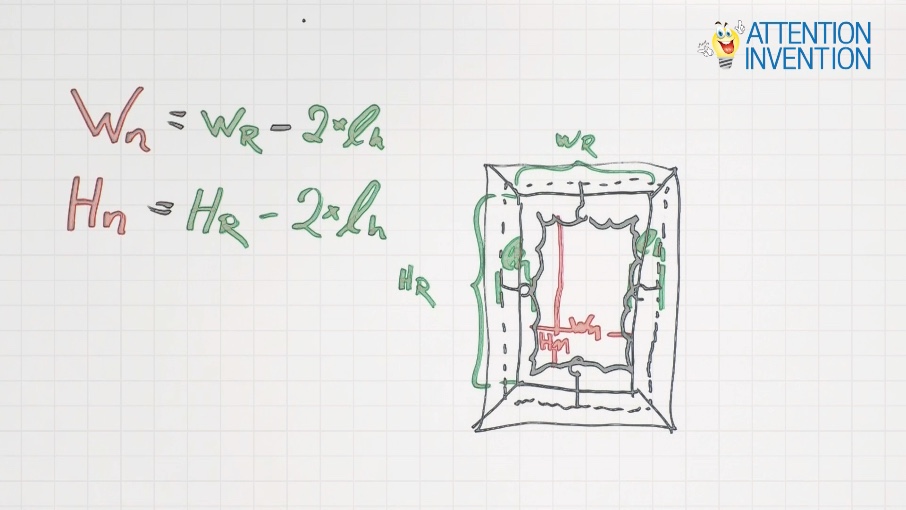
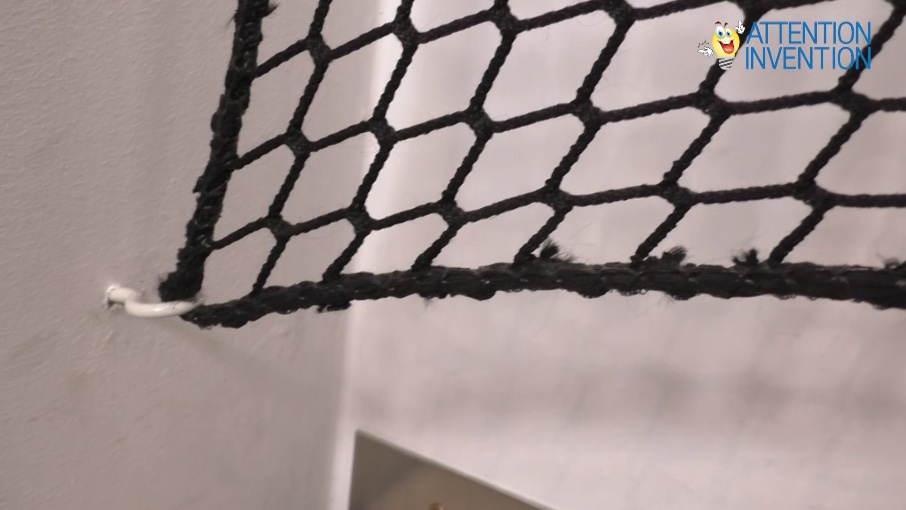
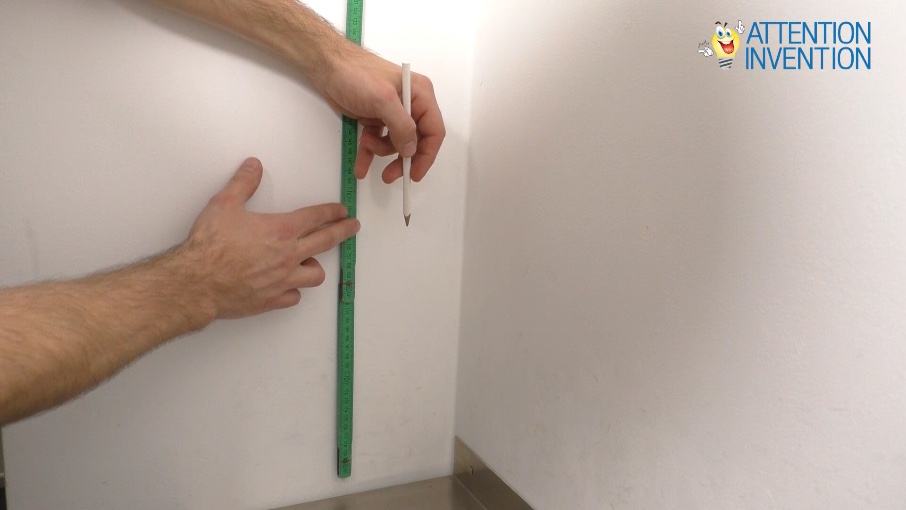
Next, measure the internal dimensions, so height and width of your door frame or wall recess, respectively. In case you cannot screw the hooks into the upper, lower, left, and right wall, consider inserting a beam, rail, frame or a similar supportive structure. In this case, measure the internal dimensions of the recess/beam Window.

Now, let’s configure the net. Nets can, for example, be configured and ordered here:

www.netze-seile-mehr.de

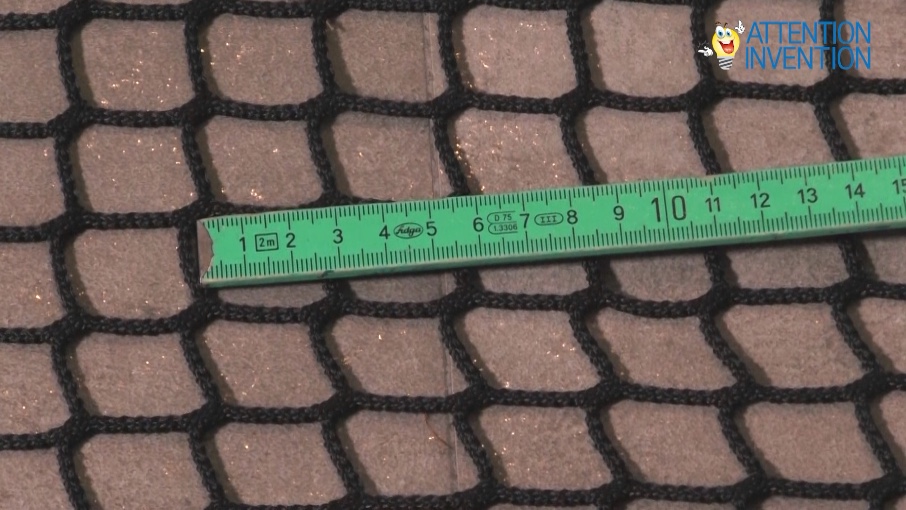
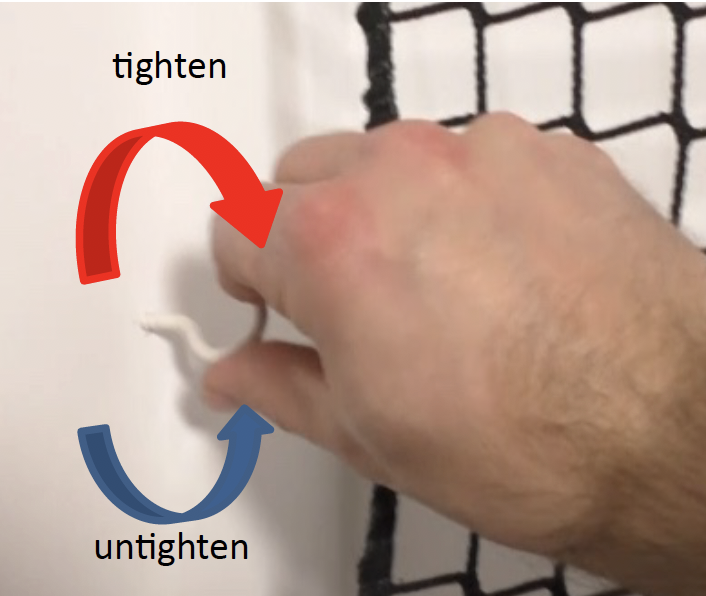
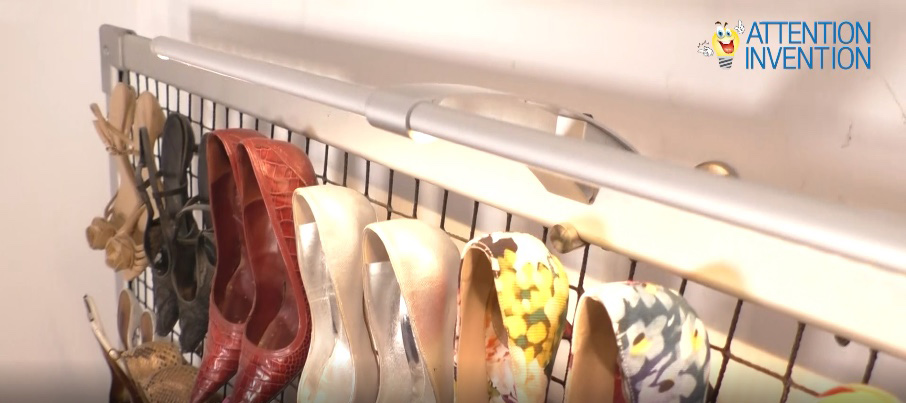
Nets are available in various materials, colors and dimensions. For our purpose, we will need a non-elastic net in order to tighten it using a minimal number of turns of our screw hooks. The mesh size should match most of the heels you wish to accommodate. However, the larger you choose the mesh size, the lower the number of possible positions for each pair of shoes will be. This in turn will lower the maximum capacity of your shoe net. For most pumps collections a mesh size between 3 and 4 centimeters (1.2 to 1.6 inches) turned out to be ideal.

The diameter of the string itself depends on the overall size of your net, since the higher the amount of shoes, the stronger the net needs to be. You usually don’t want to go with anything thinner than 2 millimeters (0.078 inch).

For determining the outer dimensions of the (commonly) rectangular net, you will need to subtract at least the maximum protrusion length of two screw hooks from the length and the width measured for your recess. This is because the net will stretch over time so and you will then want to be able to tighten the net by a couple of turns of the screw hooks.

A cord edge is almost mandatory for your net in order to spread the forces of the screw hooks over the net. Moreover, the cord edge, in my opinion, looks better and facilitates using the net with a corresponding sail track.

Regarding the color, in order to not steal the show from your shoes, black or dark grey as a default option is recommend. If you prefer a brighter color, please keep in mind that shoes may carry dust and dirt or may even rub off pigment, especially if wet.

The rest of the project is rather easy and straight forward:

Install the screw hooks at a distance of about 20 to 25 centimeters (about 8 to 10 inches) to each other around the door frame. Make sure to maintain the clearance of at least 12 to 15 centimeters (5 to 6 inches) to the rear wall and hang the cord edge into the hooks. Be sure to tighten the net in order to prevent distortion and swinging of the net a]er filling it with shoes.

If the net is too loose, screw the hooks deeper into the wall, if it is too tight or if hanging the cord edge into the hooks is not possible at all, turn the screen hooks in the opposite direction.

Now, it’s time for a test: Fill the net with shoes and check the tension of the net. You may need to give the screw hooks a couple of turns in order to compensate for the weight of the shoes. 

In addition, I recommend aiming a light spot at the net in order to present the collection and to facilitate choosing the most adequate pair for the occasion.

You will also find a couple of further ideas and additional features in the German patent application DE 10 2011 107 156 A1

Are you curious about which other features can be applied to the shoe net or do you need additional information? Visit www.attention-invention.com and make sure to send us pictures as soon as you have finished your personal shoe net.

Made an Invention > click here to contact us!